| string art |
Use a ruler or any straight edge and colored pencils or markers to connect the dots. (You can even transfer the patterns to wood, hammer nails into the dots, and wrap string or thread from nail to nail to make your designs.)
Here are some ideas to get you started! icosihenagon
Print out patterns for making your own string art pictures!
Start from the top corner, make a line down to the first bottom dot (away from the edge), and work your way along from there.
Make a second layer in another color, starting at the top corner and making a line down to the third or fourth dot away from the edge. You will get a different curve. With the square pattern, you can start over again from each remaining corner, repeating these two curves.
Make four curves in four colors, starting each from a different corner.
Using a square or hexagon pattern, start by angling across the pattern and continue working your way around. What shape forms in the center?

Place a layer of another color on top of the first layer, starting with a different angle. You can make as many layers as you like!
What ideas can you think of to try with the + or star-shaped pattern??
Patterns:
(Click this shape on the pattern pages to return to this menu!)

string art #1

string art #2

string art #3

string art #4

string art #5
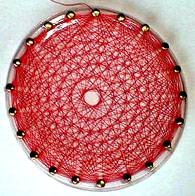
made from one very long thread
wrapped around 21 pins!
More patterns are coming soon!
© copyright 2000 -
by Wendy Petti of Math Cats. All Rights Reserved.